|
|
Once the lyric-src-release.tar.gz is donwloaded you can extract the archive with the WinZip utility, which can be found at http://www.winzip.com. Double click on the lyric-src-release.tar.gz file where you downloaded it, and say Yes to decompress the archive in a temporary folder. Then click on the Extract button to get into the extraction dialog, as shown in Figure A.1.
In the extraction dialog, make sure that All files is selected, and that Use folder names is checked, as shown in Figure A.1. Then select a path to extract LYRIC to. Finally press the Extract button to launch the extraction.
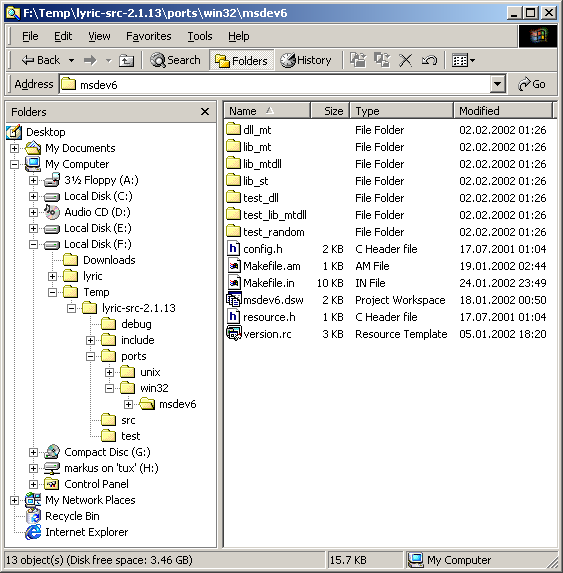
Now open the Explorer and locate the Microsoft Visual Studio workspace file msdev6.dsw. As shown in Figure A.2, this file is located in the ports/win32/msdev6 directory in the LYRIC source hierarchy.
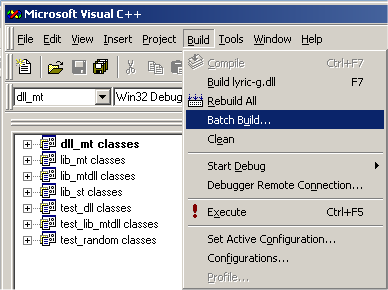
Once Visual Studio C++ showed up select Batch Build... from the Build menu, as shown in Figure A.3.
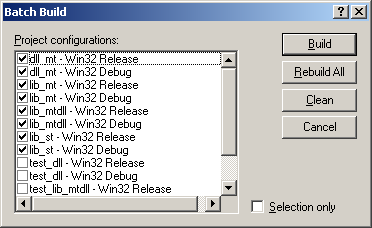
In the Batch Build dialog that shows up, as shown in Figure A.4, select the LYRIC libraries you want to build. Check or uncheck the boxes in front of each project. Begin with unckecking all test_ projects first. These are LYRIC test projects, and of no use during the libraries building phase.
The choice of the libraries to build will vary depending on what kind of project using LYRIC you will build. Each project will compile LYRIC with different C++ code generation settings. As a rule of thumb use the LYRIC library that matches with the code generation you set in your third party project. Table A.1 gives the code generation used for each project/library.
|